Having an allotment is an excellent investment in yourself and your health. You get the opportunity to eat your homegrown vegetables and get some exercise, too. On top of this, working on your allotment can help your mental health, too. According to research carried out at Essex and Westminster universities, even half an hour per week spent in your allotment can reduce your stress and fatigue levels.
When you first envision your dream allotment, it is tempting to start planning out your plot straight away and buying seeds and plants. Unfortunately, it isn’t quite this easy. Allotments in most areas are in high demand and have long waiting lists. When you finally get yours, you rarely end up with a perfectly formed plot ready for planting. There is plenty of work to do, so let's look at how you find, manage and get started with your new allotment.


Step 1: Finding and managing an allotment
The first thing to do when you decide you want an allotment is to find one. Check your local area for allotments nearby or contact your local council about the availability of plots. You can also apply for an allotment on the government website. Pop your postcode in, and the website will direct you to the most relevant page to offer you advice.
When you apply for an allotment, you should prepare for a long wait. How long will depend on the demand levels in your area. According to a survey carried out by The Association of Public Service Excellence, the average waiting list time was 18 months. You will receive a call or email when an allotment becomes available in the area, and it is your turn in the list. Ensure you know where the allotments in your area are, and try to secure an allotment within a reasonable distance from your home. They can take up a lot of your time, so it can be much easier to manage if it is on your doorstep.
The accessibility of the plot is another issue to consider. Not all allotments have easy roadside access, and not all will have parking nearby. Take a little time to plan where you will be parking and how far you have to carry your tools and equipment on foot. Consider investing in a wheelbarrow to help cart your compost, plants and tools to the plot. If you don't have space at the allotment to keep a wheelbarrow, you can get some excellent folding options that will fit into the boot of your car.
Once you have a plot and can visit your allotment, the next step it to ensure you have all the information you need. Take a look at the facilities available, including the water supply. Make sure you are aware of any rules and regulations that apply to your allotment. Check you understand your lease arrangements, including when you need to make payments and how to make them. After you have this information, it's time for the fun to start, and you can check out your plot.
Take a notebook and pen with you when you head to your plot for the first time. You will need to plan what you want to achieve! The first thing to do is to assess the plot. Consider where it's located, the size and whether it's shady or in a sunny spot. If you can get to the soil, look at the type of soil you will be working with, too. Next, start to jot down the work that needs doing. How much clearing and work do you need to do? Are there any plants you want to save? You can also start to plan out the plot and what you want to grow where.
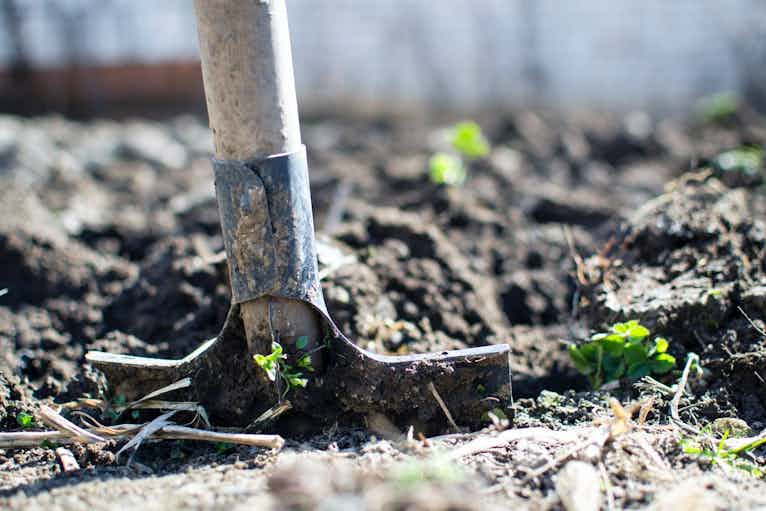
Step 2: Clearing and getting your plot ready
Allotments usually become available after a period of being unused by the previous owner. They are often in a neglected state which can mean you have an overgrown area full of weeds, brambles and debris to deal with. It can be a big job, but once it's out of the way, you can really get started on planning and cultivating your allotment. It’s best to get started clearing the allotment as soon as possible. The ideal time would be during the autumn and winter months. Unfortunately, you can't always choose when you start, so whatever time of year, get stuck in and clear the allotment.
During the clearing process, there are several decisions to make. The first of these being, how do you cope with all those weeds? These can be tricky to get rid of, especially if the plot has grown wild for a few months. You could use weedkillers to help ensure the weeds are gone, but this will affect the soil. If you were hoping for homegrown organic produce, the weedkiller might affect this too. One method you can use is to smother the weeds. Once you have cleared the weeds, lay down pieces of flat cardboard over the soil to reduce the light levels and avoid the weeds regrowing.
Another decision you may want to make is whether you will clear the whole plot or a smaller section to get started. If you get your plot during the growing seasons, you may want to clear out one portion and start growing some plants in your first year. Then, you can clear the rest of the plot at a more convenient time to get it ready for the next season.
Step 3 - Check you have the right tools and equipment for the job
Gardening can seem like it needs a lot of equipment. And it sometimes does! However, you can get started with a few basics. A good garden fork, a spade and some gardening gloves are the basics you need to begin with. You can slowly invest in the rest of the equipment as you find you need it. One thing to consider is whether you need a shed on your allotment. If you don't want to take your equipment back and forth, this is a great option. Ensure you have a good lock on the door to keep your gardening tools safe while you are not around.
Step 4 - Plan your layout and get gardening
Before you start sewing your seeds, it's best to spend some time planning. Plan your layout and what plants work best in which section of the allotment. This can then also provide the basis for your planting plan. Make a note of which areas of the allotment need planting and maintaining at which times of the year.
Emma Bailey from The Pink Shed told Age Times: "Do consider implementing the no-dig method into your allotment plan. It's really simple, just layer up your beds with organic matter (woodchip, compost, manure) and let the earthworms do the rest. Not only is this great for the environment (digging releases carbon into the atmosphere), but you'll end up with soil that is rich in biodiversity and with far fewer weeds!"
Choose plants that will grow well in the environment you have. Look at nearby allotments to see what others are growing. You can also make friends with the other gardeners in the allotment for more inspiration. Many of them will have been gardening for years and will have a wealth of information to share with you about the allotment. We also have some great articles here that can provide inspiration. Check out our articles about how to take care of your garden in spring, autumn and winter.